Wednesday, October 24, 2012
Ideas for your Home: decorlola@blogspot.com
Ideas for your Home: decorlola@blogspot.com: Hellooo! Today I am going to share my Moroccan tables with you. I had not done too many difficult projects before taking this one on, so...
Wednesday, October 17, 2012
decorlola@blogspot.com
Hi again. This is the continuation of my last blog.
This is all. I hope you were inspired by some of the items! I had a lot of fun putting the room together. Lola
The Moroccan Room
 |
| The clay lamp shade is from Nicaragua. It is decorated with moons and stars. It looks Moroccan! |
 |
| The throw is from Turkey, a present from a friend. |
 |
| This portrait I did of my husband years ago, seemed to fit. The plate is from Morocco. |
 |
| This carved jaguar head is Mexican. I mounted it on a green piece of wood so it would stand out from the wall. The picture under it is hard to see, but it is a Middle Eastern scene. Maybe I will make a copy of a colorful Matisse to put in the room! |
 |
| The window covers and the roman blinds I made from a beautiful fabric. |
Friday, October 12, 2012
decorlola@blogspot.com
Hello you all!

I will continue with yesterday's blog showing you some features of the "Moroccan" room. The room is rather dark because it has wood paneling, so some of the pictures will not be that great. I apologize. I could have used flash, but I don't like the glary images.
The bedroom has a green beadboard ceiling, so I wanted to use fabrics that would go with it. I made the tassels from embroidery thread.

The other side of the room has a Victorian chair turned Moroccan with color, a shiny fabric and small
finials on top, which were very hard to find. I lucked out at a garage sale.
The table is Moroccan. I had the tray and found the legs at a thrift shop. The mirror has nothing to do with Morocco, but I needed one there!

I will share the rest of the room details in my next blog. I feel like Scheherezade: come back tomorrow if you want to see more! Adios!
Thursday, October 11, 2012
decorlola@blogspot.com
Hellooo!

Today I am going to share my Moroccan tables with you. I had not done too many difficult projects before taking this one on, so I chose a simple design. All four sides on the bottom are the same size and they taper a little towards the top. The pieces were not that difficult to cut with my little jigsaw.

The bottom part of the table is 3/4 inch plywood. The tops are solid pieces I happened to have. They were about the right size for a bedside table.
The tabletop was stained green. The rest of the table was painted with a matching semi-gloss latex. I chose
to stain the top because the wood had very pretty markings, which, at the end, did not show that well.
The table and the stencil designs were taken from Google Images. I looked at many and adapted them to fit my taste. I also used latex paints for the stenciling.
I will give details of the rest of the room in the next blog. Hasta la vista. Lola


The bottom part of the table is 3/4 inch plywood. The tops are solid pieces I happened to have. They were about the right size for a bedside table.
The tabletop was stained green. The rest of the table was painted with a matching semi-gloss latex. I chose
to stain the top because the wood had very pretty markings, which, at the end, did not show that well.
The table and the stencil designs were taken from Google Images. I looked at many and adapted them to fit my taste. I also used latex paints for the stenciling.
 |
| Here they are in the "Moroccan" room at our house |
I will give details of the rest of the room in the next blog. Hasta la vista. Lola
Sunday, October 7, 2012
decorlola@blogspot.com
Hi everyone. This is a continuation of my last blog entry.
.jpg)

The piece came out even better than I expected it to be. I was sorry to paint the black vintage door hinges, but the knobs I chose were white ceramic and the black hinges did not look good. Perhaps at some point I will strip the hinges and find black hardware for the drawers. I painted the cabinet with semi-gloss latex.
See you next time. Lola
A "new" piece of furniture
I had a sketch of what I wanted the piece to look like, but I changed and added details as I was building it.
.jpg) |
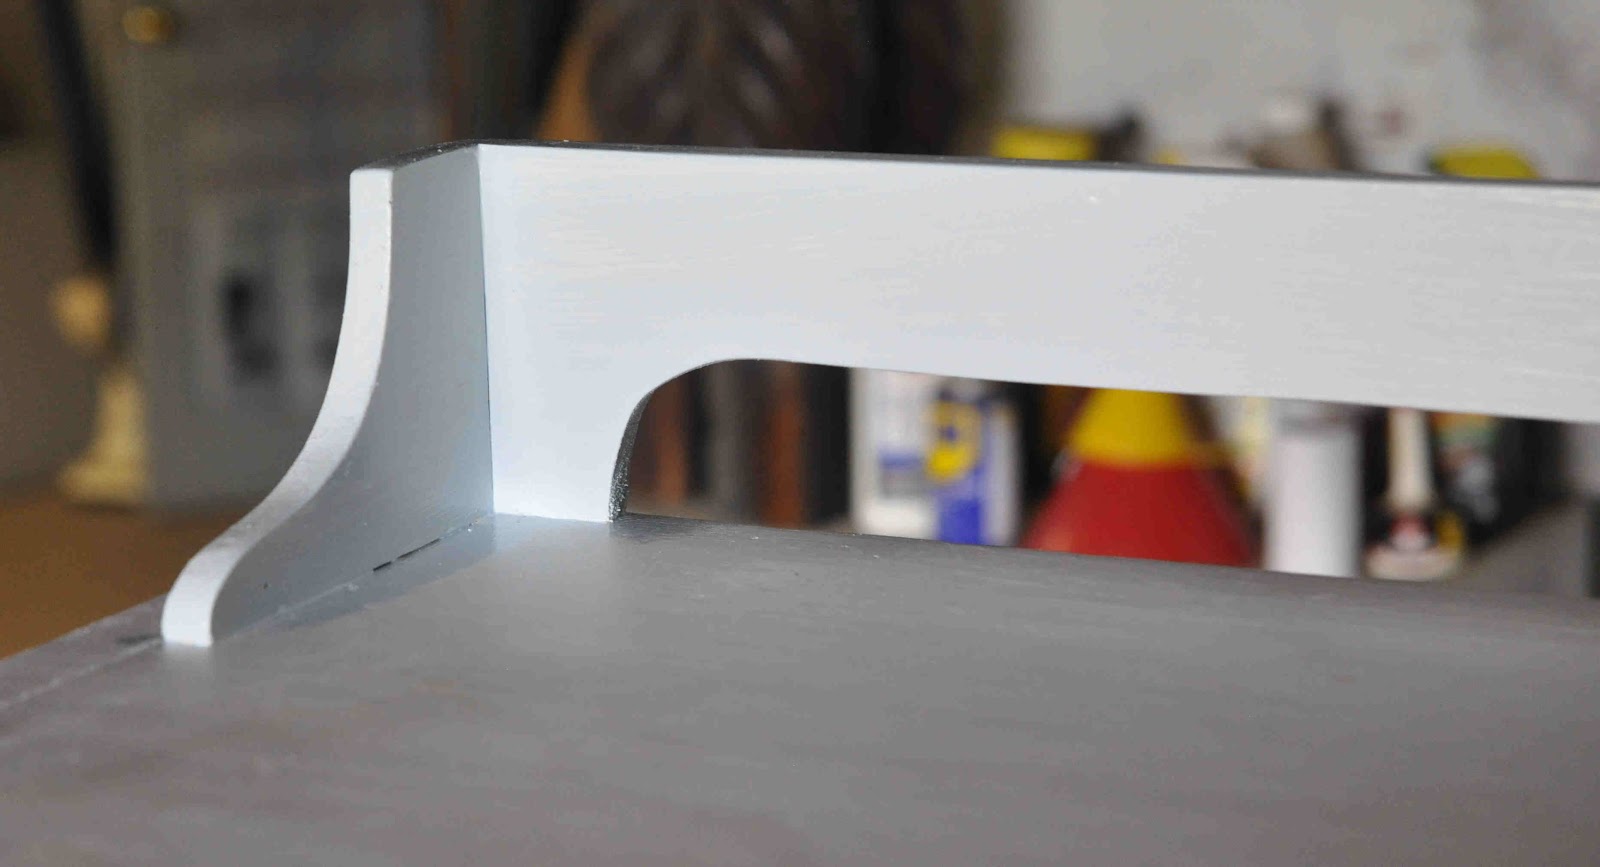
| This is the top of the desk. The piece of wood for the legs runs from the top all the way to the bottom |
 |
| I wanted to add a door, so I cut a piece to mimic the scallop on the right side and added a bottom. I also cut decorative pieces for the legs. |
.jpg)
 |
| I added a piece to the top, also mimicking the curves on the bottom part, to give the whole piece more unity |

The piece came out even better than I expected it to be. I was sorry to paint the black vintage door hinges, but the knobs I chose were white ceramic and the black hinges did not look good. Perhaps at some point I will strip the hinges and find black hardware for the drawers. I painted the cabinet with semi-gloss latex.
See you next time. Lola
Wednesday, October 3, 2012
decorlola@blogspot.com
A "new" piece of furniture
Hi everyone. Today I am going to show you the transformation of a simple wooden desk into a jazzy cabinet.
I feel like a magician!
 |
| It went from this..... |
 |
| to this.... |

 |
| to this! |
Subscribe to:
Posts (Atom)