Thursday, November 29, 2012

A little box for a 7-year old girl

Hi everyone!

Xmas is coming and I have a few gifts to make. This year I have someone new on my list:  my niece's 7-year old stepdaughter, Riley.  I made her a little box where she can keep her treasures.


I used a wooden champagne box. These boxes have carved lettering and I filled in the small ones on the bottom with Spackle. I decided to cover the large ones.


A thin piece of plywood does the trick. I used glue to attach it. Riley loves Hello Kitty, so I decided to paint the little cat's face on it and her initial on the other side.


I first painted around the figures.  The little balls on the right are going to be the feet.


Masking tape to the rescue to finish the edges.


I thought the green added a nice touch.

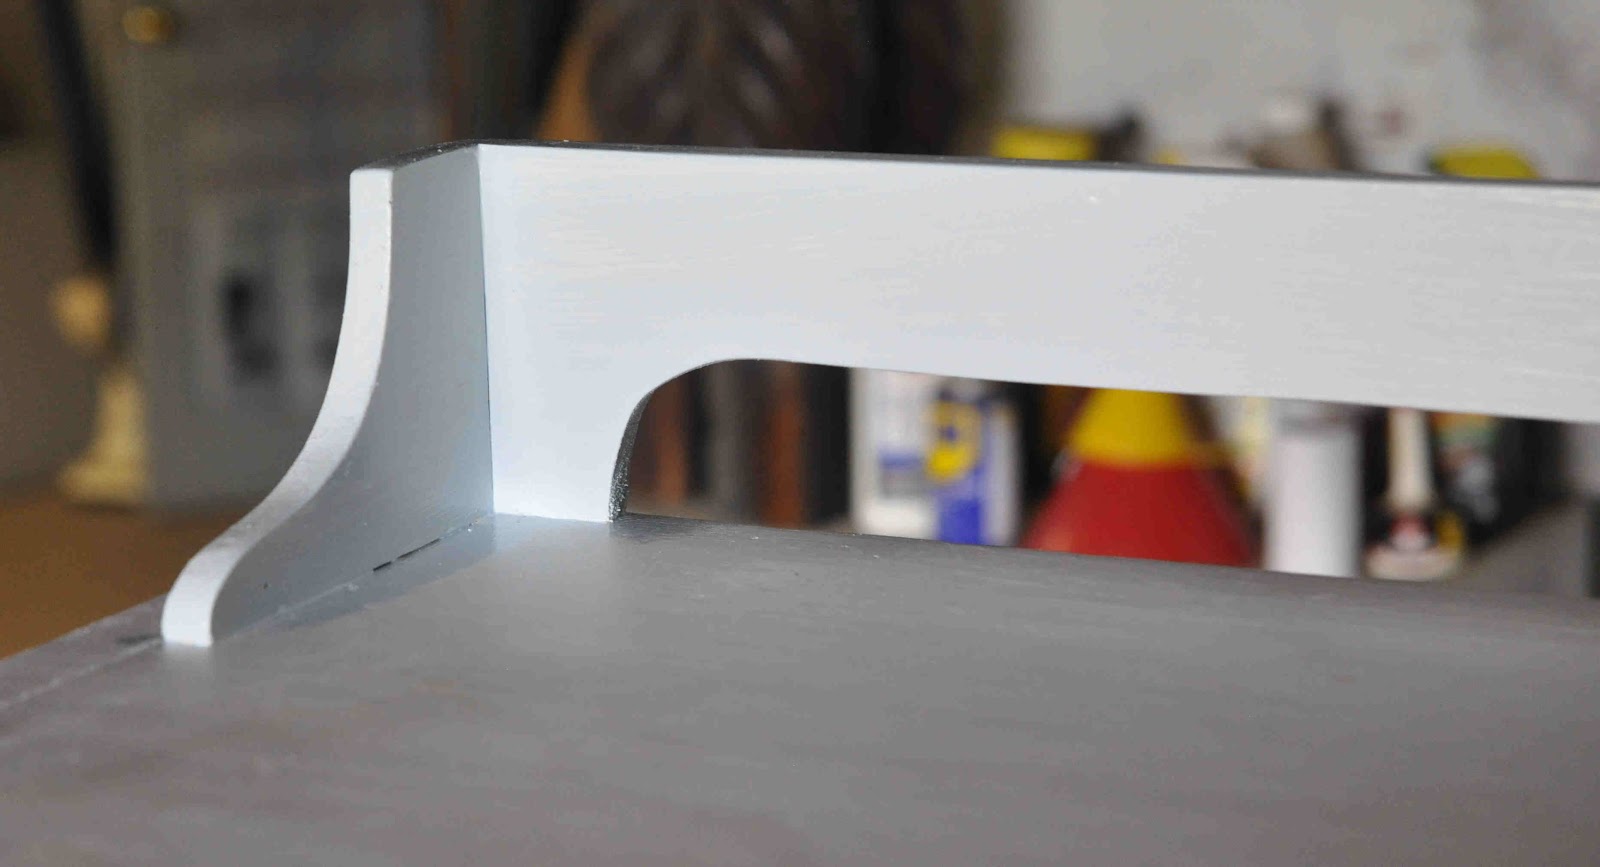
The feet are screwed on from the inside.


This is the finished box. Notice that I went over the cat face and the initial with magic marker.  I then polyurethaned the  box.

Some inexpensive metal corners, a shiny hasp and lock, and you have it.  I added the polka dots with a store-bought stencil. I thought it needed a little more decoration. 

The tassel was only fifty cents at a trimmings store.  I used to make my own!  No more.  


Pretty paper glued over a piece of cardboard, covers the bottom of the box.


See you next time! Lola


Saturday, November 17, 2012

An oriental "rug".

Hi everyone.

I have been working on my rug and have not posted for a few days. It is painted on my hallway floor and it has both Islamic and William Morris designs. When I design something, I look through Google images and then adapt whatever I like to make my design work. After all the trouble I went through with this rug, I wish I had just copied the design from a real Oriental, of which we have several. I cut all new stencils for this one and I made it up as I went along! I didn't even measure, I eyed everything. You should have seen me trying to make the arabesques look like they made sense on both sides of the rug, since the spacing was off.  I doubt that anyone is going to look that closely!


This is not the first rug I have painted on this spot.  The old one, below, was painted over to make room for the new one!  I used stencils that I had used for other designs. We had it for many years and I wanted a new look.


The spider plant is painted on my kitchen door. The plant's leaves served as a decoration for this rug.

All I did was turn the stencil sideways. Another stencil that I had used in a bedroom worked well on the edge.

I started this "new" rug" two years ago, and never finished it.  Since my blog was not in existence then, there are no pictures of how I started it. However, I took enough pictures as I was finishing it so you can get an idea of how it was done.

For this rug I chose to paint the wood planks two different colors, since it looks more realistic.

 Let's focus on the red diamond below.  Each color was painted separately, the white, the red and then the green, in that order.  The different bands were not pre-planned. I just went with what looked good to me.
Of course, I decided ahead of time what colors I would use in the overall design.


Notice that the arabesque design around the red square is stenciled only on the right side. I then flipped the stencil and painted the left side.  See below.


The stencil was hard to manage because it was large, and the lines of the arabesque were thin.  I had to cut it twice since the first one tore. Notice how wide the "bridges" are.  Bridges in a stencil are the uncut pieces that connect the parts so the stencil does not fall apart.  I had to connect the pieces freehand. You do what you have to do.


 Before and after connecting the bridges in the light and the dark gray arabesques.


On another one of the squares, I had to paint a blue line and stencil diamonds on the dark green space. First, I painted the blue line using painter's tape. Then I used a stencil for the diamonds. It is the same stencil I used for the edge of the rug.


To complete the rug I stenciled a fringe on both ends. The rug is colorful and both my husband and I are happy with it!  Are you going to paint a rug in your apartment?  It does take time, but it is fun and a great way to cover a hallway.  


Wednesday, October 24, 2012

Ideas for your Home: decorlola@blogspot.com

Ideas for your Home: decorlola@blogspot.com: Hellooo! Today I am going to share my Moroccan tables with you.  I had not done too many difficult projects before taking this one on, so...

Wednesday, October 17, 2012

decorlola@blogspot.com

Hi again.  This is the continuation of my last blog.

The Moroccan Room


The clay lamp shade is from Nicaragua. It is decorated with moons
and stars.  It looks Moroccan!

The throw is from Turkey, a present from a friend.
 This portrait I did of my husband years ago, seemed to fit. The plate is from Morocco.


This carved jaguar head is Mexican. I mounted it on a green piece of wood so it would stand out from the wall.
 The picture under it is hard to see, but it is a Middle Eastern scene. Maybe I will make a copy of a colorful Matisse to put in the room!
The window covers and the roman blinds I made from a beautiful fabric.
This is all. I hope you were inspired by some of the items! I had a lot of fun putting the room together.  Lola

Friday, October 12, 2012

decorlola@blogspot.com


Hello you all!


I will continue with yesterday's blog showing you some features of the "Moroccan" room. The room is rather dark because it has wood paneling, so some of the pictures will not be that great. I apologize. I could have used flash, but I don't like the glary images.

The bedroom has a green beadboard ceiling, so I wanted to use fabrics that would go with it. I made the tassels from embroidery thread.


The other side of the room has a Victorian chair turned Moroccan with color, a shiny fabric and small
finials on top, which were very hard to find. I lucked out at a garage sale.  

The table is Moroccan. I had the tray and found the legs at a thrift shop. The mirror has nothing to do with Morocco, but I needed one there!

The headboard is a street find. I turned the legs upside down so it would have a more "grand" look.  The Arabic stenciling says "sweet dreams".


I will share the rest of the room details in my next blog.  I feel like Scheherezade:  come back tomorrow if you want to see more!  Adios!

Thursday, October 11, 2012

decorlola@blogspot.com

Hellooo!


Today I am going to share my Moroccan tables with you.  I had not done too many difficult projects before taking this one on, so I chose a simple design. All four sides on the bottom are the same size and they taper a little towards the top. The pieces were not that difficult to cut with my little jigsaw.


The bottom part of the table is 3/4 inch plywood. The tops are solid pieces I happened to have. They were about the right size for a bedside table.

The tabletop was stained green.  The rest of the table was painted with a matching semi-gloss latex.  I chose
to stain the top because the wood had very pretty markings, which, at the end, did not show that well.

The table and the stencil designs were taken from Google Images.  I looked at many and adapted them to fit my taste.  I also used latex paints for the stenciling.

Here they are in the "Moroccan" room at our house

I will give details of the rest of the room in the next blog. Hasta la vista.  Lola

Sunday, October 7, 2012

decorlola@blogspot.com

Hi everyone.  This is a continuation of my last blog entry.

A "new" piece of furniture


I had a sketch of what I wanted the piece to look like, but I changed and added details as I was building it.  

This is the top of the desk. The piece of wood for the legs runs from the top all the way to the bottom 


I wanted to add a door, so I cut a piece to mimic the scallop on the right side and added a bottom.
I also cut decorative pieces for the legs.


I added a piece to the top, also mimicking the curves on the bottom part,  to give the whole piece more unity


The piece came out even better than I expected it to be. I was sorry to paint the black vintage door hinges,  but the knobs I chose were white ceramic and the black hinges did not look good.  Perhaps at some point I will strip the hinges and find black hardware for the drawers. I painted the cabinet with semi-gloss latex.

See you next time.  Lola

Wednesday, October 3, 2012

decorlola@blogspot.com

A "new" piece of furniture

Hi everyone. Today I am going to show you the transformation of a simple wooden desk into a jazzy cabinet.
I feel like a magician!


It went from this.....

to this....
to this!
 I am going to post this blog now and give you the details of how the cabinet was completed in the next one. I am having lots of trouble with my computer crashing before it gets posted!  Au Revoir!

Wednesday, September 26, 2012

Paper Mache Gilded pitcher

Hi everyone.

Thank you for all your comments. Someone asked me why I was giving away so much detail, and didn't I want to sell the product?  Well, the truth is that paper mache and gilding is so time consuming, that I would have to sell this pitcher, for instance, for at least $600 in order to make it pay for my time.  It is for sale if you want it.  And we can haggle a little over the price!

The next thing I want to share with you is my paper mache gilded pitcher, which I was talking about.  It is about 14 inches tall. It took 13-15 layers of newspaper to make the structure sturdy enough. (For paper mache I use flour and water.)


I started with a balloon for the lower half. The top was molded over the neck of a clay pitcher. A cardboard handle was added.

The scalloped base was also cut from cardboard covered with about 3 layers of newspaper. Two or three coats of gesso gave it more body. (Instead of gesso you can use latex primer.)


I realize now that for the base I could have used a plastic or cardboard deli container and then cut out the scallops, but it did not occur to me at the time! Live and learn.


Notice that in order to make it flare at the bottom, which is what I wanted, I had to cut it on a bias, and I ended up splitting the scallops to make it happen.


The pitcher decorations were cut out of cardboard from the cleaners, soft enough to cut with scissors but of a nice thickness.  I copied the design for the top from a Dover book, of which I have many.   


 For the bottom, I scored the shapes down the center to make them appear in relief. Had I thought about it sooner, I would have done the same to the top part.  I tend to act and do on impulse, although most of the time I mull the project in my head for months before I actually do it since I always have four of five things going at the same time.


Silver Leafing

After the pitcher was constructed, I covered it with 2 coats of gesso and then a coat of red latex paint. It took 2 coats of silver leaf to cover the whole thing completely. The band around the neck of the pitcher was created using 2 bands of round elastic.

If you are interested, I explained silver leafing and the use of the red paint in my first blog when I described the gilded frame.

Please ask me any questions you have and I will be happy to get back to you.  Email me or write a comment. I will try to post something at least once a week, so please check it out!  Thank you.  Lola

Tuesday, September 25, 2012

Stenciled Coasters

Simple Wood Coasters


Hi everyone. This is a very simple project.  I don't even remember where I got the wood pieces, I had them for so long. They are about 1/4 inch thick and 3 1/2 inches wide.  

I primed them and painted them with gray latex.  The stencil design is store bought.  A simple "S" stenciled on top finished the job.  A polyurethane finish will make them last.  


Any questions?  Thanks for reading.  Lola


Gilded frame with appliqued cutouts


DecorLola
Decorative ideas for your home


Decorlola.blogspot.com

Hi everyone. My name is Lola Sandino Stanton.  When I was 14 years old I told everyone I was going to be an interior decorator.  That was a long time ago in a country where there were no interior decorators at the time:  Nicaragua.

I did not become one, but I think I could have been one. I have been a photographer, a writer, video maker, fitness trainer and, finally, an art teacher.  At age 55 or so, I discovered that I love painting.  I also love paper mache, stenciling, screen-printing, carpentry--- in general, just making things. I want to share with you some of the projects I  create.

Check out my paintings at lolastantonart.com

Gilded frame with appliqued cutouts

The first project I want to share with you is a silver gilded frame. 

I love decorative frames. At museums I look at frames carefully.  For a recent commission I wanted to make a delicate guild frame to enhance a portrait. It took many hours, definitely not a money making endeavor, but it was fun an interesting.


I started by making the outside frame myself. A added wood trim on the edges for more detail. You can purchase a simple frame at a place like Michael's, but I couldn't find a flat one the right size.  The insert frame is store bought. 


After priming it, I painted the frame with flat red latex, a color traditionally used under guild surfaces. I have read that a spring green is also good for silver leaf. 

I buy latex color paint samples so I can have a variety of colors in stock. Latex spreads smoothly and easily. I have tried acrylic paint but you can see the brush strokes and it gets gooey. 


The next step was to sketch a design for the decoration.  I cut it out of the cardboard that comes from the dry cleaners because it is thin enough to cut with scissors. I then glued the pieces in place with white glue.  I numbered them because I wanted the repeats to look the same, but after a while I realized that it would not make any difference.


Once the pieces were pasted on, I painted over them with more latex paint to seal the edges of the pieces just in case I had not applied enough glue. Then it was time to apply the silver leaf.  I am not going to gives details on leafing since there are plenty of tutorials in the internet.


I used a spray adhesive instead of a liquid adhesive to apply the silver leaf (actually aluminum leaf). The spray dries quickly but it allows you to work on the piece for up to eight hours.  


I had to put two coats of leaf on it because I had a lot of bald spots. For small bald patches, you can use a brush-on liquid adhesive called adhesive size. 

I waited a day or two and then covered it with two coats of high gloss spray polyurethane.  I tried liquid poly using a very soft brush, but the brush lifted off some of the leaf.  I used high gloss after I discovered that low luster or matte dulls the beautiful sheen of the silver leaf.

Make sure the glue is dry before you let your Norwegian Forest cat help you.  Cat hairs do not enhance the look! I was very pleased with the frame and so was my client.


Another appliqued frame

This was a present for my new grand-niece, Olivia. I followed the same steps as the frame above, but this time I used animal silhouettes from Google images.  I printed them out the right size and then traced them on cardboard and cut them out. The frame is from Michael's.

See you next time! Lola